
Rendr WooCommerce App
Overview
The Rendr WooCommerce App allows you to offer Rendr delivery services directly in your WooCommerce checkout.
Once installed, your customers can select Rendr delivery options while placing an order, and deliveries can be automatically booked through Rendr.
How it works
The integration connects your WooCommerce checkout to Rendr’s delivery platform.
- WooCommerce sends parcel and address information to Rendr during checkout.
- Rendr returns available delivery services and pricing.
- The customer selects a Rendr delivery option at checkout.
- When the order is placed, Rendr can automatically book the delivery.
- Rendr manages delivery tracking and status updates.
Once booked, delivery information can be referenced in your fulfilment workflow.
What you’ll need
- Admin access to your WooCommerce dashboard
- The latest version of the Rendr WooCommerce App
- Your Rendr credentials, provided by the Rendr Onboarding & Integration team:
- Brand ID (Tenant ID)
- Client ID
- Client Secret
- Store ID
Before you start
Before installing, make sure your WooCommerce store supports third-party shipping methods.
Rendr requires accurate product dimensions and a correct shipping zone setup to display delivery options correctly.
Implementation steps
Step 1: Install the Rendr WooCommerce App
Step 2: Activate the plugin
Success looks like:
- Rendr appears in your installed plugins list
- The plugin status shows as Active
Step 3: Enter your Rendr credentials
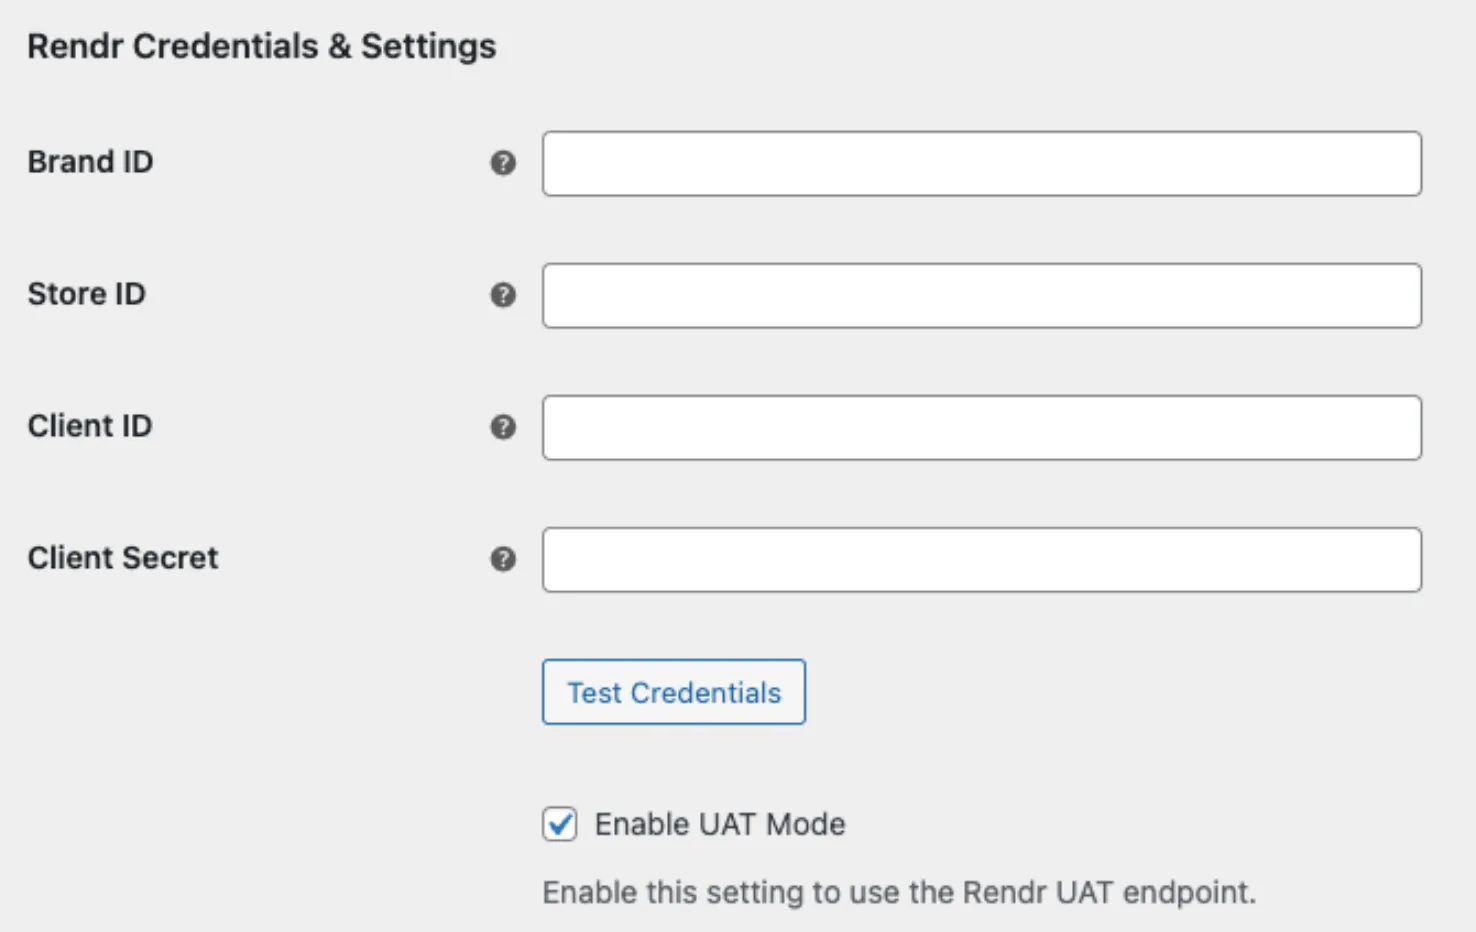
Step 3.1: Enable Test (UAT) Mode (if applicable)
This step is applicable when you have been provided with Rendr UAT credentials.
Your Rendr Onboarding & Integration team will be able to assist and verify whether this mode is available for your integration path.
UAT Mode allows you to test your configuration safely before going live. In UAT Mode:
- Quotes work normally
- Deliveries are created for testing only
- No real driver allocation occurs
Step 4: Set automatic delivery booking
This setting controls whether deliveries are automatically booked when an order is placed.
If this setting is disabled, deliveries may not be dispatched until they are manually booked.
Step 5: Set Authority to Leave (ATL)
This setting controls whether parcels can be left in a safe place if the recipient is not available.
If ATL is disabled and no one is available to receive the delivery, the order may be returned to sender.
Step 6: Set default parcel dimensions & weight
Rendr requires accurate parcel sizing to calculate delivery pricing correctly.
All products should have:
- Length
- Width
- Height
- Weight
We strongly recommend setting dimensions and weight at the product level to avoid pricing discrepancies.
Step 7: Set special product types (if applicable)
Select any applicable special product types in the Rendr settings.
When enabled, all deliveries will be created with these delivery considerations applied.
Only enable these options if they match your product catalogue.
Step 8: Ready for the Go-Live!
Rendr delivery rates will only appear in shipping zones where Rendr is enabled as a shipping method.
Once you have configured all settings, to go live:
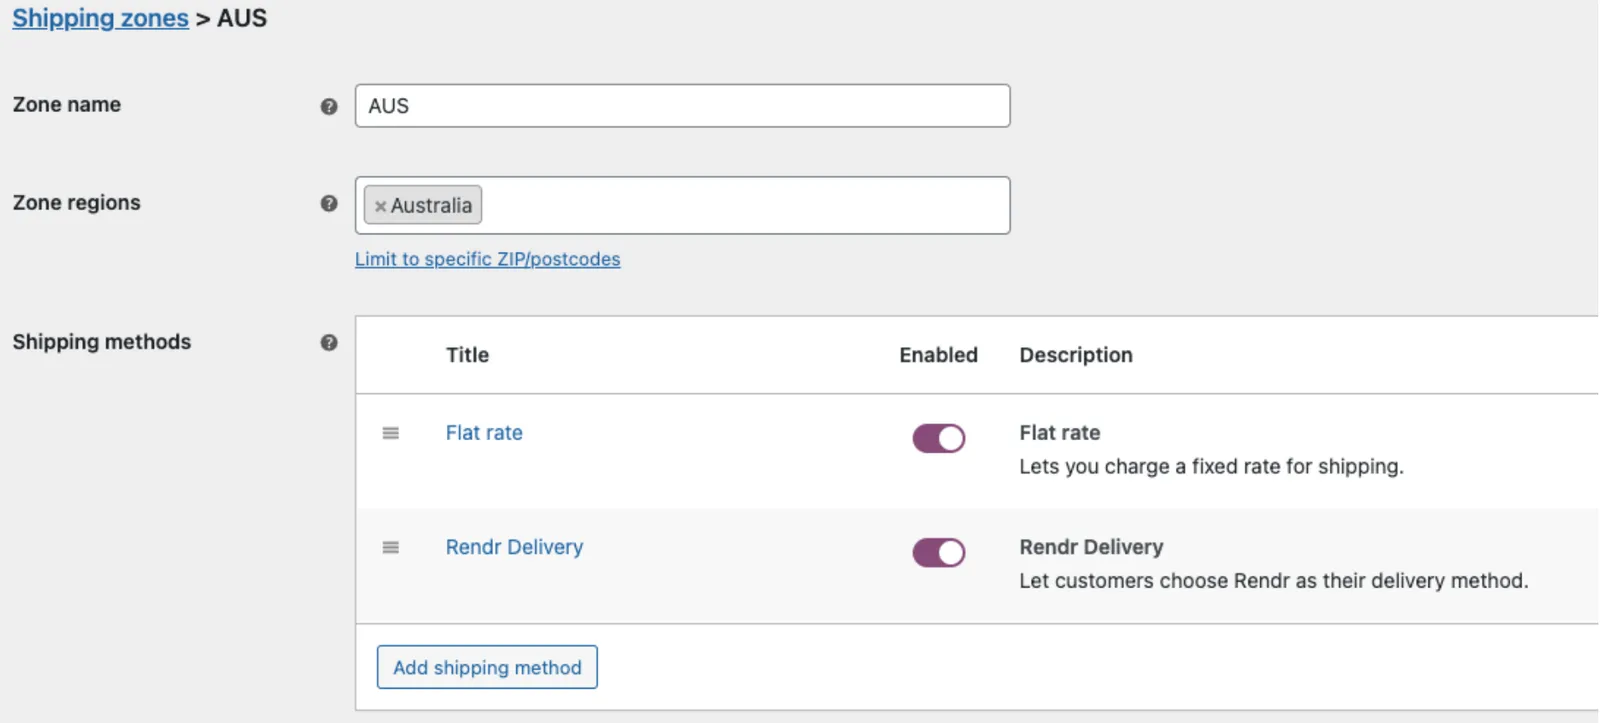
Success: Customers see Rendr delivery options in all required zones.
Disable Rendr delivery options
If you need to disable Rendr delivery options:
This removes Rendr services from checkout immediately.
Testing
Testing ensures delivery options and booking behaviour work correctly.
Test checkout delivery options
Enter customer and address details
Enter the customer and address details. Choose an address within the agreed distance of your Rendr services.
For example:
- Fast (3-hour) option will show up if the shipping address is located within 20km from the dispatch location.
- Flexible (Same Day / Next Day) option will show up if the shipping address is located within 50km from the dispatch location.
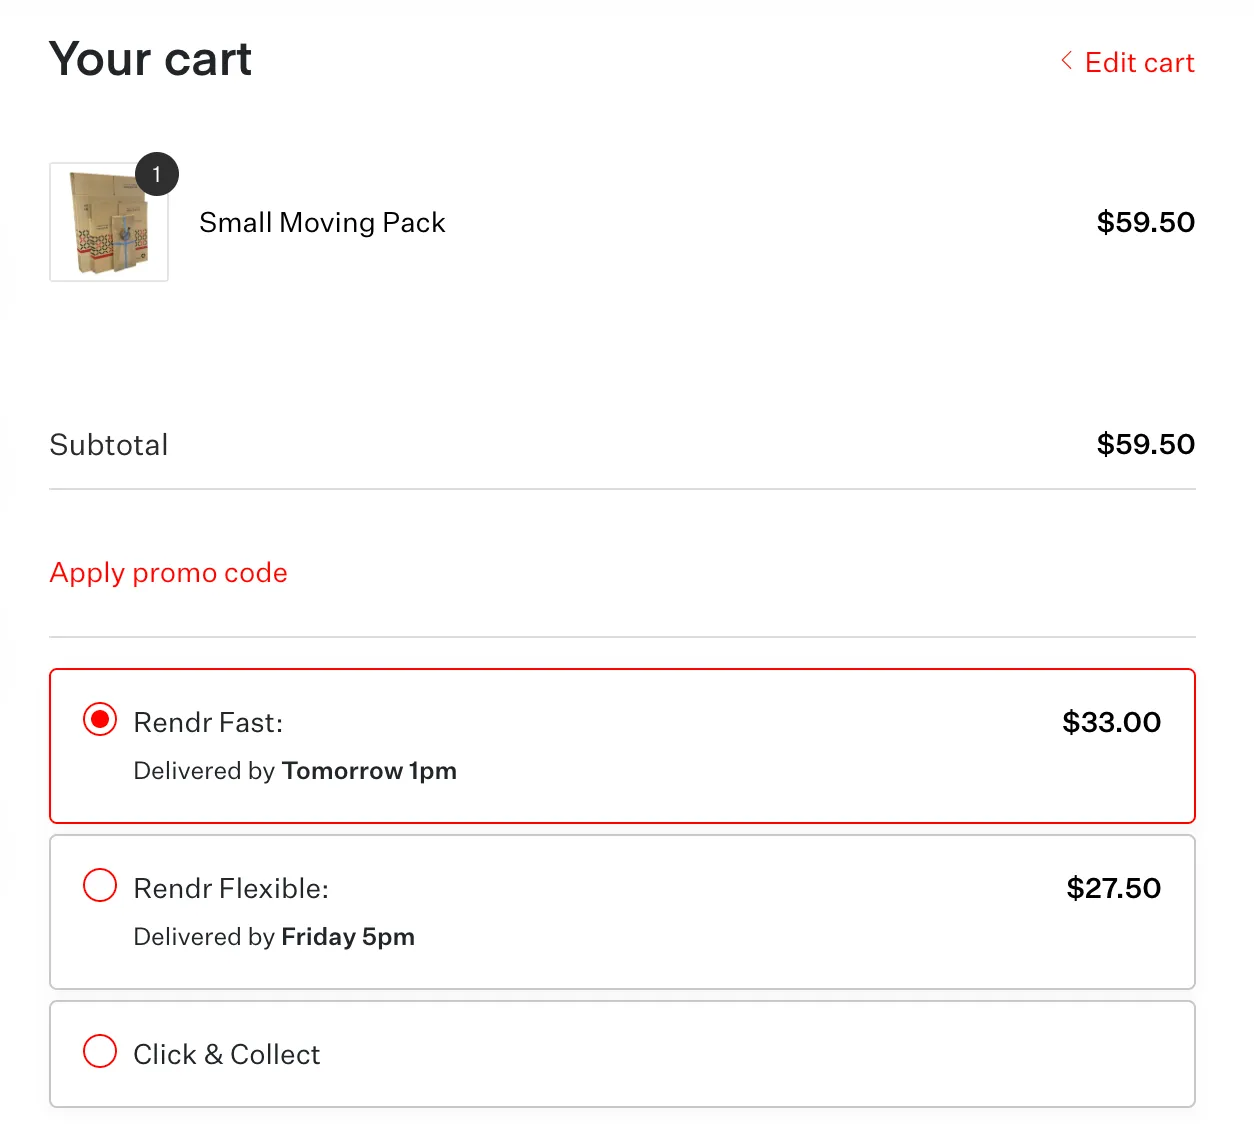
Success looks like:
- Rendr delivery options appear as shipping methods
- Rendr is selected as the shipping method for the order
Confirm delivery booking in Rendr
This test applies if automatic delivery booking is enabled (Step 4).
Log in to the Rendr Delivery Dashboard
Log in to your Rendr Delivery Dashboard: https://retailer.rendr.delivery/login
Success looks like:
- The delivery status is Created or Requested
- Tracking is available (if enabled)
Support and troubleshooting
Contact us
If you need assistance, contact Rendr Support.
Common issues
Rendr delivery rates are not appearing at checkout
Cause: Shipping zones are not configured correctly.
Resolution:
- Go to WooCommerce > Settings > Shipping > Shipping Zones.
- Open the relevant zone.
- Ensure Rendr Delivery is enabled.
Authentication error when connecting the plugin
Cause: The Brand ID, Client ID or Client Secret is incorrect.
Resolution:
- Re-open the Rendr plugin settings.
- Copy and paste your credentials again.
- Save your changes and refresh the page.