
Rendr Delivery Shopify App
Overview
The Rendr Delivery Shopify App allows you to offer Rendr delivery services directly in your Shopify checkout. Once installed, your customers can select Rendr delivery options (3-Hour and Same Day) at checkout while placing an order.
This integration helps merchants:
- Provide flexible delivery choices at checkout
- Display live delivery pricing based on parcel size and destination
- Automatically notify Rendr when orders are placed
- Reduce manual delivery booking work
How it works
- Shopify sends parcel and address information to Rendr during checkout.
- Rendr returns available delivery services and pricing.
- The customer selects a Rendr delivery option (Fast, Same Day or Standard).
- When the order is placed, Shopify notifies Rendr automatically.
- Rendr creates a delivery request and manages delivery tracking.
Once booked, delivery status updates can flow back into your fulfilment process.
What you’ll need
- Admin access to your Shopify store, with permission to install apps
- Custom Carrier Rates enabled in Shopify (showing rates at checkout requires third-party carrier-calculated rates)
- Your Rendr credentials, provided by the Rendr team at onboarding:
- Client ID
- Client Secret
- Tenant ID
- Store ID
Before you start
Verify that Custom Carrier Rates are enabled on your store
Rendr delivery options require Shopify’s Custom Carrier Rates feature to show rates at checkout. Carrier-calculated shipping rates are available in your shipping settings.
Custom Carrier Rates should already be included if you are on a Shopify Advanced or Shopify Plus plan.
To verify:
- Log in to Shopify Admin.
- Go to Settings > Shipping and delivery.
Success looks like: You can access and edit shipping profiles to manage rates for products.
If Custom Carrier Rates are not available, contact Shopify Support and request that Custom Carrier Rates be enabled on your store.
Implementation steps
Step 1: Install the Rendr Delivery Shopify app
- Open the Rendr Delivery Shopify App: https://apps.shopify.com/rendr-delivery-platform
- Click “Install”.
- Review the requested permissions.
- Click “Agree and Install”.
Once installed, the app is available under your Shopify Apps:
- In Shopify Admin, go to “Apps”.
- Click “Rendr Delivery Shopify”.
Step 2: Enter your Rendr credentials
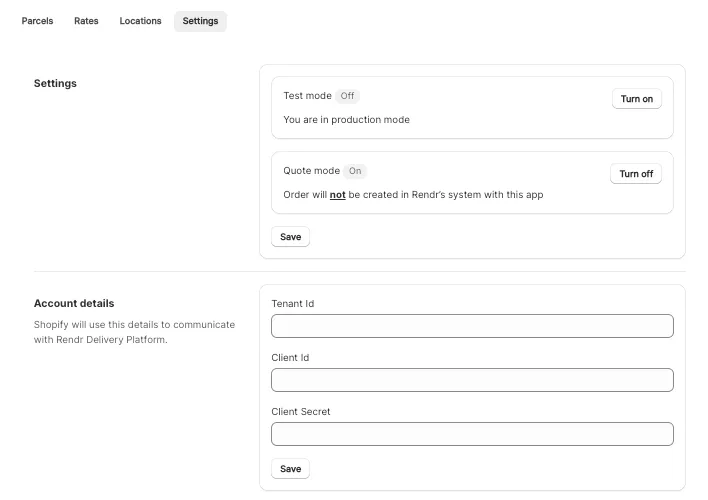
Make sure “Test Mode” is “OFF” when entering your Rendr credentials.
- Open the “Rendr Delivery Shopify” app.
- Go to the “Settings” tab.
- Under “Account details”, enter your Rendr credentials:
- Tenant ID
- Client ID
- Client Secret
- Click “Save”.
Step 3: Confirm Rendr carrier rates are enabled
- Log in to Shopify Admin.
- Go to “Settings > Shipping and delivery”.
- Review your shipping profiles.
Success looks like: Your shipping profile shows rendr_delivery as a shipping option.
If rendr_delivery does not appear, add it manually:
- Click “Add shipping option”.
- Set “Rate type” to “Carrier or App calculated”.
- Set “Carrier or App” to
rendr_delivery. - Select both shipping services:
- Rendr Fast
- Rendr Flexible
- Click “Save”.
Step 4: Configure store location
Rendr can automatically choose the best dispatch point.
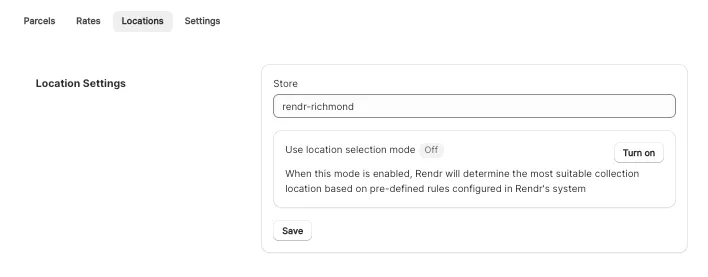
- Open the “Rendr Delivery Shopify” app.
- Go to the “Locations” tab.
- In “Store”, enter your “Store ID” (provided by the Rendr team).
- (Optional) Set “Location selection mode”:
- “ON”: Rendr determines the most suitable collection location based on pre-defined rules configured in Rendr’s system.
- “OFF”: Use this if you only have one pick-up location.
Step 5: Configure parcel details
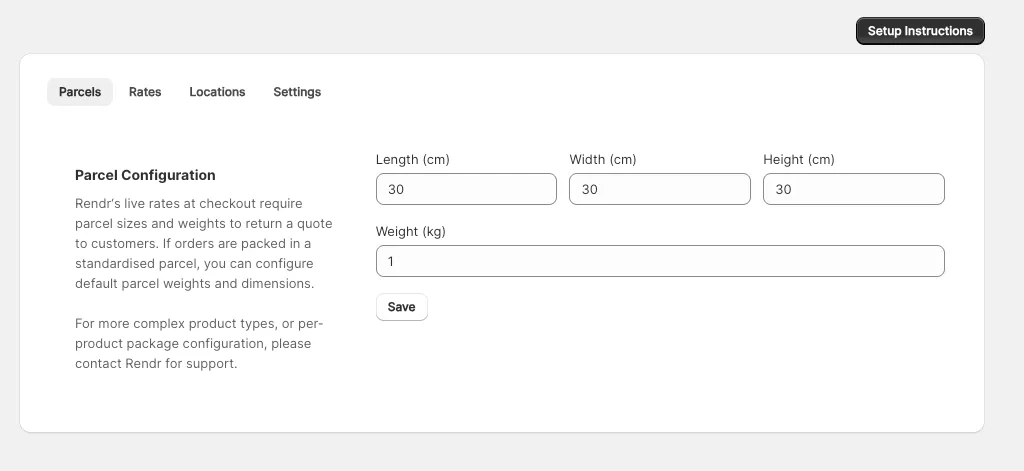
Rendr’s live rates at checkout require parcel sizes and weights to return a quote to customers. If your orders are packed in a standardised parcel, you can configure default parcel weights and dimensions.
Step 6: Enable checkout delivery options
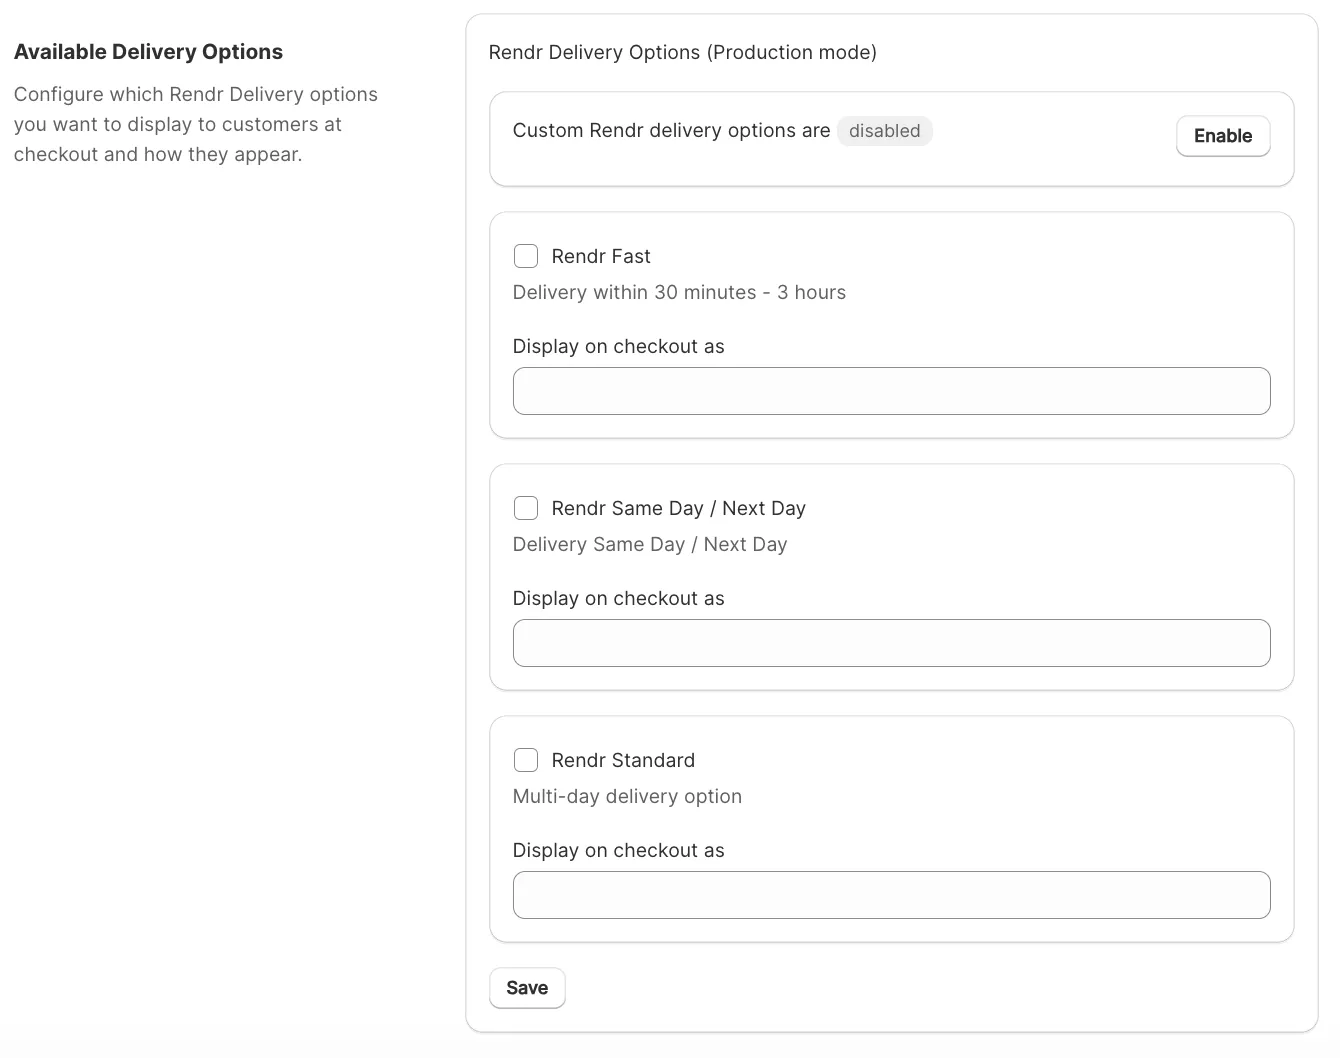
This is where you configure which Rendr delivery services appear to customers at checkout.
-
Open the “Rendr Delivery Shopify” app.
-
Go to the “Rates” tab.
-
Under “Available Delivery Options”, activate the Rendr delivery services you’d like to offer at checkout:
-
Edit the display text shown at checkout. For example:
-
When you are ready to go live, set “Custom Shipping Rates” to “ENABLED”. This will show Rendr delivery options at checkout.
-
Click “Save”.
Step 7: Enable Quote Mode (if applicable)
If Quote Mode is enabled, orders will not automatically create deliveries in Rendr.
Quote Mode allows Rendr rates to appear at checkout without creating deliveries in Rendr. By default, Quote Mode is “OFF”.
This is useful if:
- You want deliveries created through another system, for example, using Starshipit for your shipping and fulfilment workflow instead of the Rendr Delivery Dashboard.
- You only need to show Rendr delivery pricing (quotes) in Shopify checkout.
To enable Quote Mode:
- Open the “Rendr Delivery Shopify” app.
- Go to the “Settings” tab.
- Set “Quote Mode” to “ON”.
- Click “Save”.
Step 8: Test in UAT mode
Rendr Test Mode allows you to simulate deliveries without dispatching a driver. Please test the workflow in this mode before switching to Production.
To enable Test Mode:
- Open the “Rendr Delivery Shopify” app.
- Go to the “Settings” tab.
- Set “Test Mode” to “ON”.
In Test Mode:
- Quotes work normally
- Deliveries are created for testing only
- No real driver allocation occurs
Step 9: Switch to Production mode
Once you have tested the end-to-end workflow in UAT and are ready to go live:
- Open the “Rendr Delivery Shopify” app.
- Go to the “Settings” tab.
- Set “Test Mode” to “OFF”.
- Click “Save”.
The Rendr experience is now live!
Testing
Testing ensures delivery options and order creation work correctly.
Step 1: Place a test order
- Go to your eCommerce site.
- Add an item to your cart.
- Proceed to checkout.
- Enter the customer and address details. Choose an address within the agreed distance of your Rendr services (for example, Fast: 0 to 2 km from a dispatch location).
- Confirm that Rendr delivery options appear under the shipping method at checkout.
- Complete the checkout.
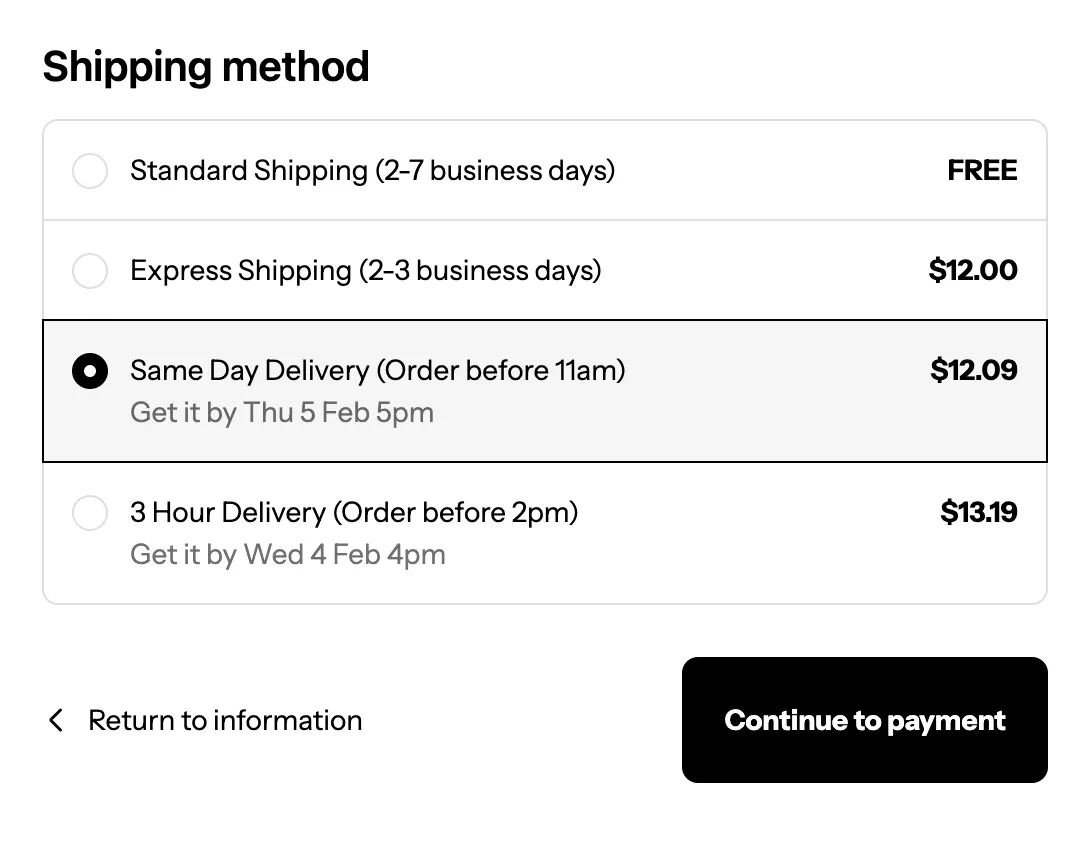
Success looks like:
- The order is placed successfully
- In Shopify Orders, Rendr is selected as the shipping method
Step 2: Confirm delivery creation in Rendr
- Log in to your Rendr Delivery Dashboard: https://retailer.rendr.delivery/login
- Go to “Manage Deliveries”.
- Find the new delivery linked to your Shopify order.
Success looks like:
- Delivery status is “Created” or “Requested”
- Tracking is available (if enabled)
Support and troubleshooting
Contact us
If you need assistance, contact Rendr Support.
Common issues
Rendr delivery options do not appear at checkout
Cause: Custom Carrier Rates are not enabled in Shopify.
Resolution:
- Contact Shopify Support.
- Request that Custom Carrier Rates be enabled.
- Refresh your shipping profiles and retry.
Authentication error when connecting the app
Cause: Tenant ID, Client ID or Client Secret is incorrect.
Resolution:
- Re-open the Rendr app Settings.
- Copy and paste your credentials again.
- Confirm you are using the correct environment.
Orders are not being sent to Rendr
Cause: Quote Mode is turned on.
Resolution:
- Go to Settings and ensure Quote Mode is turned OFF.
- Click Save and place a new test order.